1. Finish wings
2. Build wing cradle
3. Prep for starting the fuselage
4. Begin fabricating aft fuselage components
I will start at the beginning, finishing the wings. Where I left off I had been finishing off the right and left wingtips. This continued up until the point where I applied a final coat of micro which would cure in a day and be ready to sand, right? Well not when you add only 1 drop of hardener to your epoxy/micro mix. For nearly two weeks I have been waiting for the epoxy on my wingtips to cure fully.
Since the wingtips were going to take a while, I made busy working on a wing cradle. My dad's website provided a great design for a Sonex wing cradle. I read the plans and reviewed the materials list. Total expected cost, $60. I was ready to go to the hardware store when my dad reminded me that we may have most of the thing on the list, we had screws, plywood, and even 4 castor wheels. I first checked all my supplies to make sure I had enough. Item by item I went down the list. When I was done I found that the only things I needed were the 2x4s.
Since the wingtips were going to take a while, I made busy working on a wing cradle. My dad's website provided a great design for a Sonex wing cradle. I read the plans and reviewed the materials list. Total expected cost, $60. I was ready to go to the hardware store when my dad reminded me that we may have most of the thing on the list, we had screws, plywood, and even 4 castor wheels. I first checked all my supplies to make sure I had enough. Item by item I went down the list. When I was done I found that the only things I needed were the 2x4s.
 |
Laying out the parts I needed to cut on the plywood
After a quick run to home depot to get 2x4s, I scooted on home and cut them using the skill saw. I needed first to make 2 of these parts, these would be the wheels and part of the structure for holding the wings.
|
 I screwed the castors into the long board, making sure not to split the wood.
 Then I attached the upper pieces. I predrilled the holes, that way the wood wouldn't split when I installed the long screws.
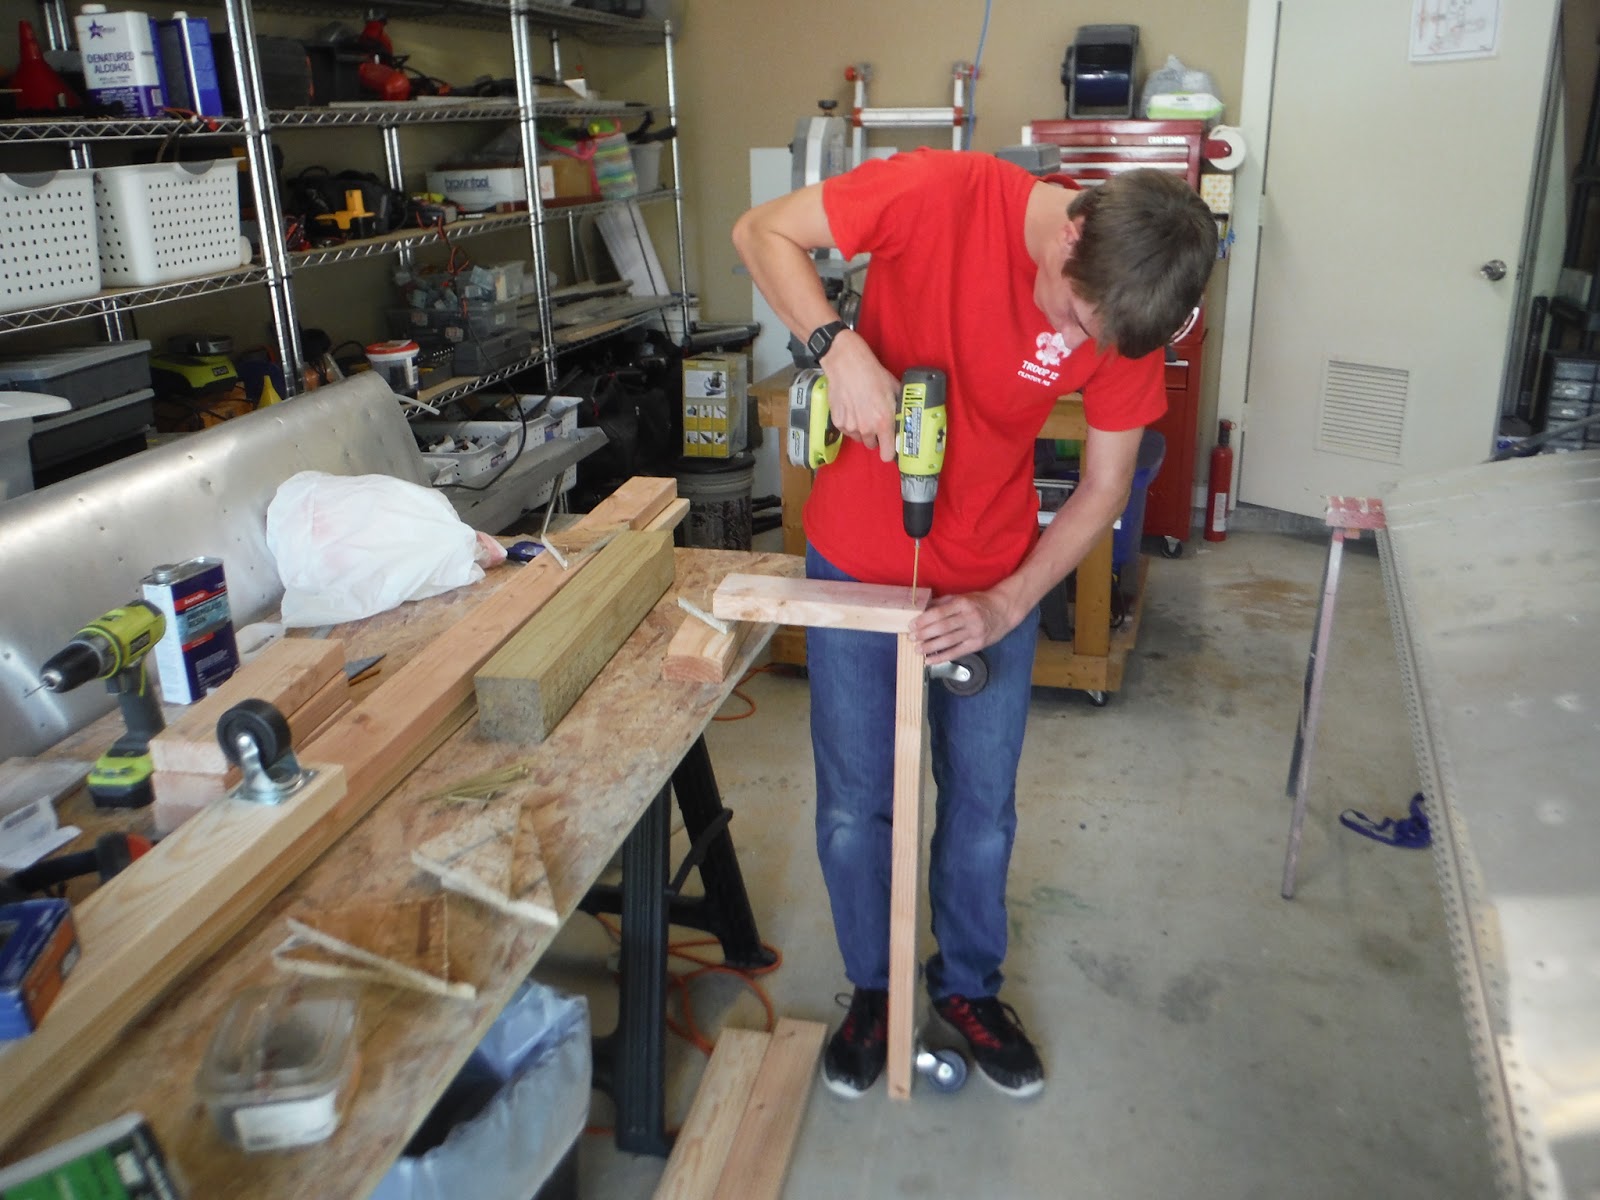


After those parts were complete I set them aside for later. The next part I made was the large vertical rectangle. It was simple enough to fabricate, the only hangup being positioning the huge thing. We added gussets to all the corners, and attached the wheel assemblies.


Finally I needed to add the crucial part, the straps which will suspend the wings. To accomplish this we rummaged through the bin'o'ratchet straps to find some straps that were useless as ratchet straps, we draped strps over the middle vertical and down to on side.


 |
| Fits Perfect! |


Now, on to the third task:
Preparing for the fuselage.
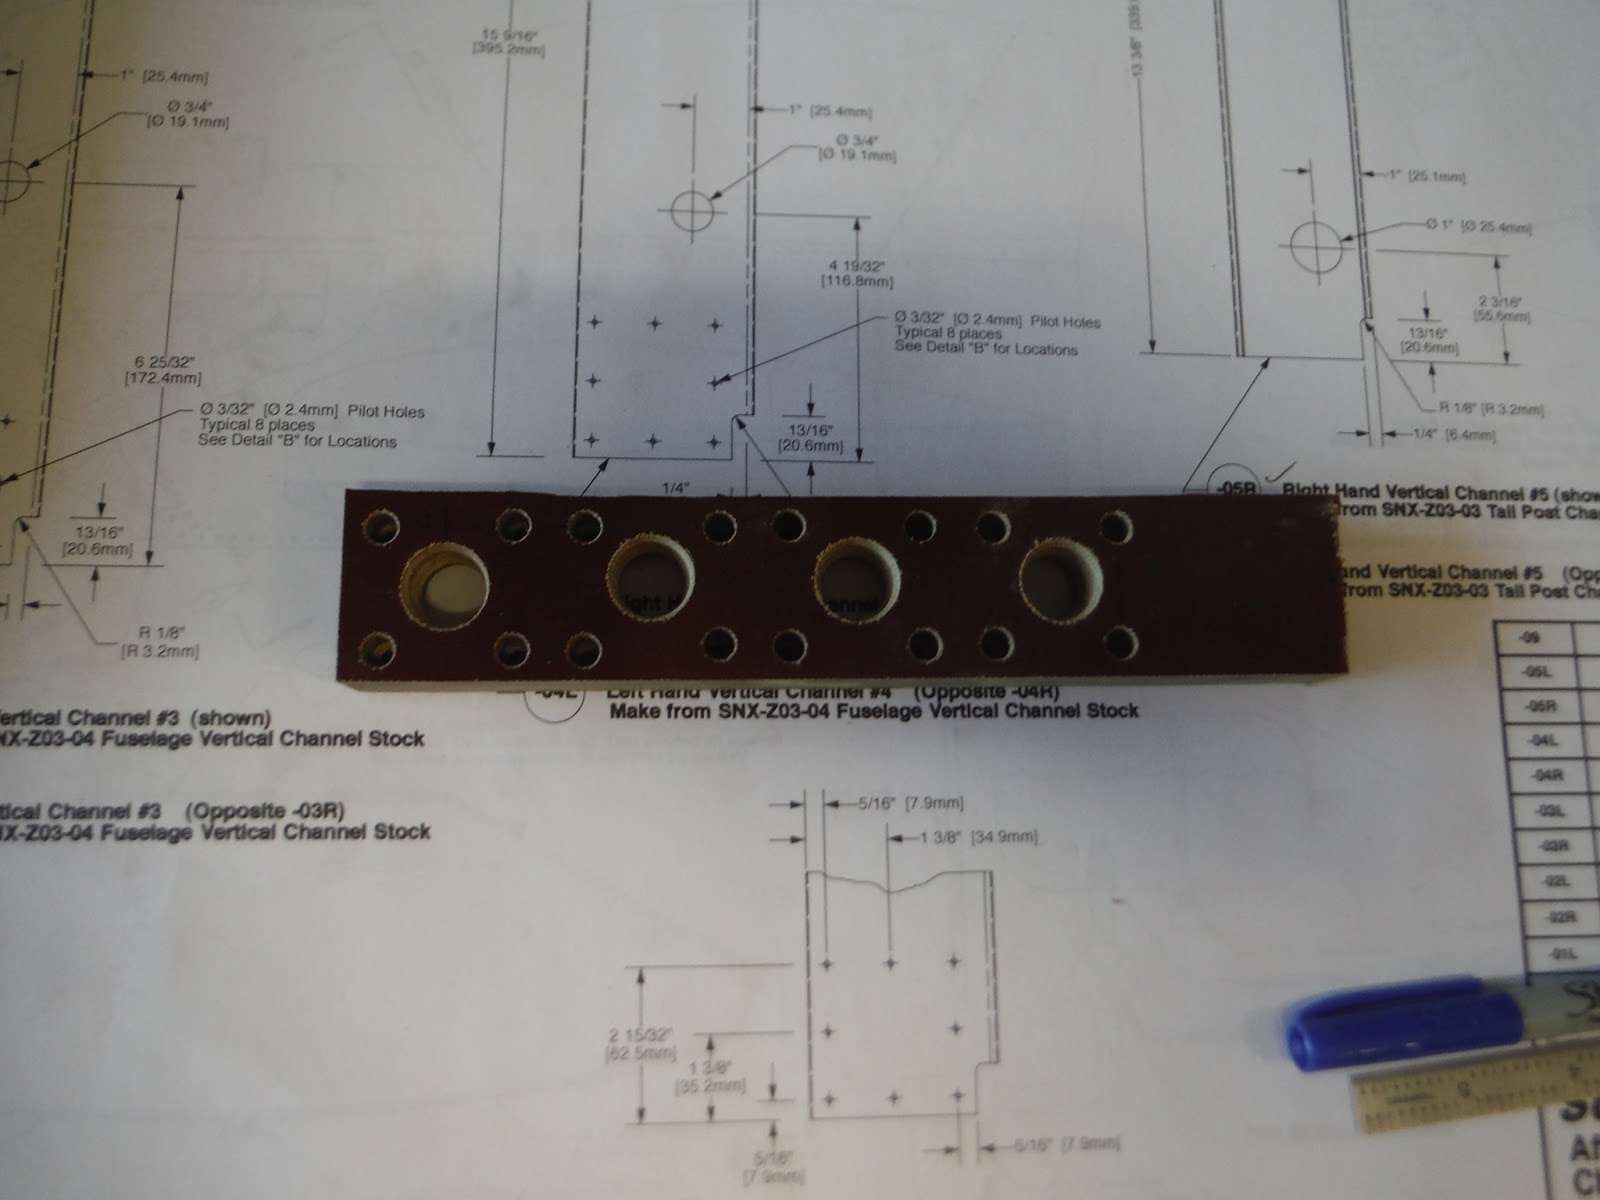
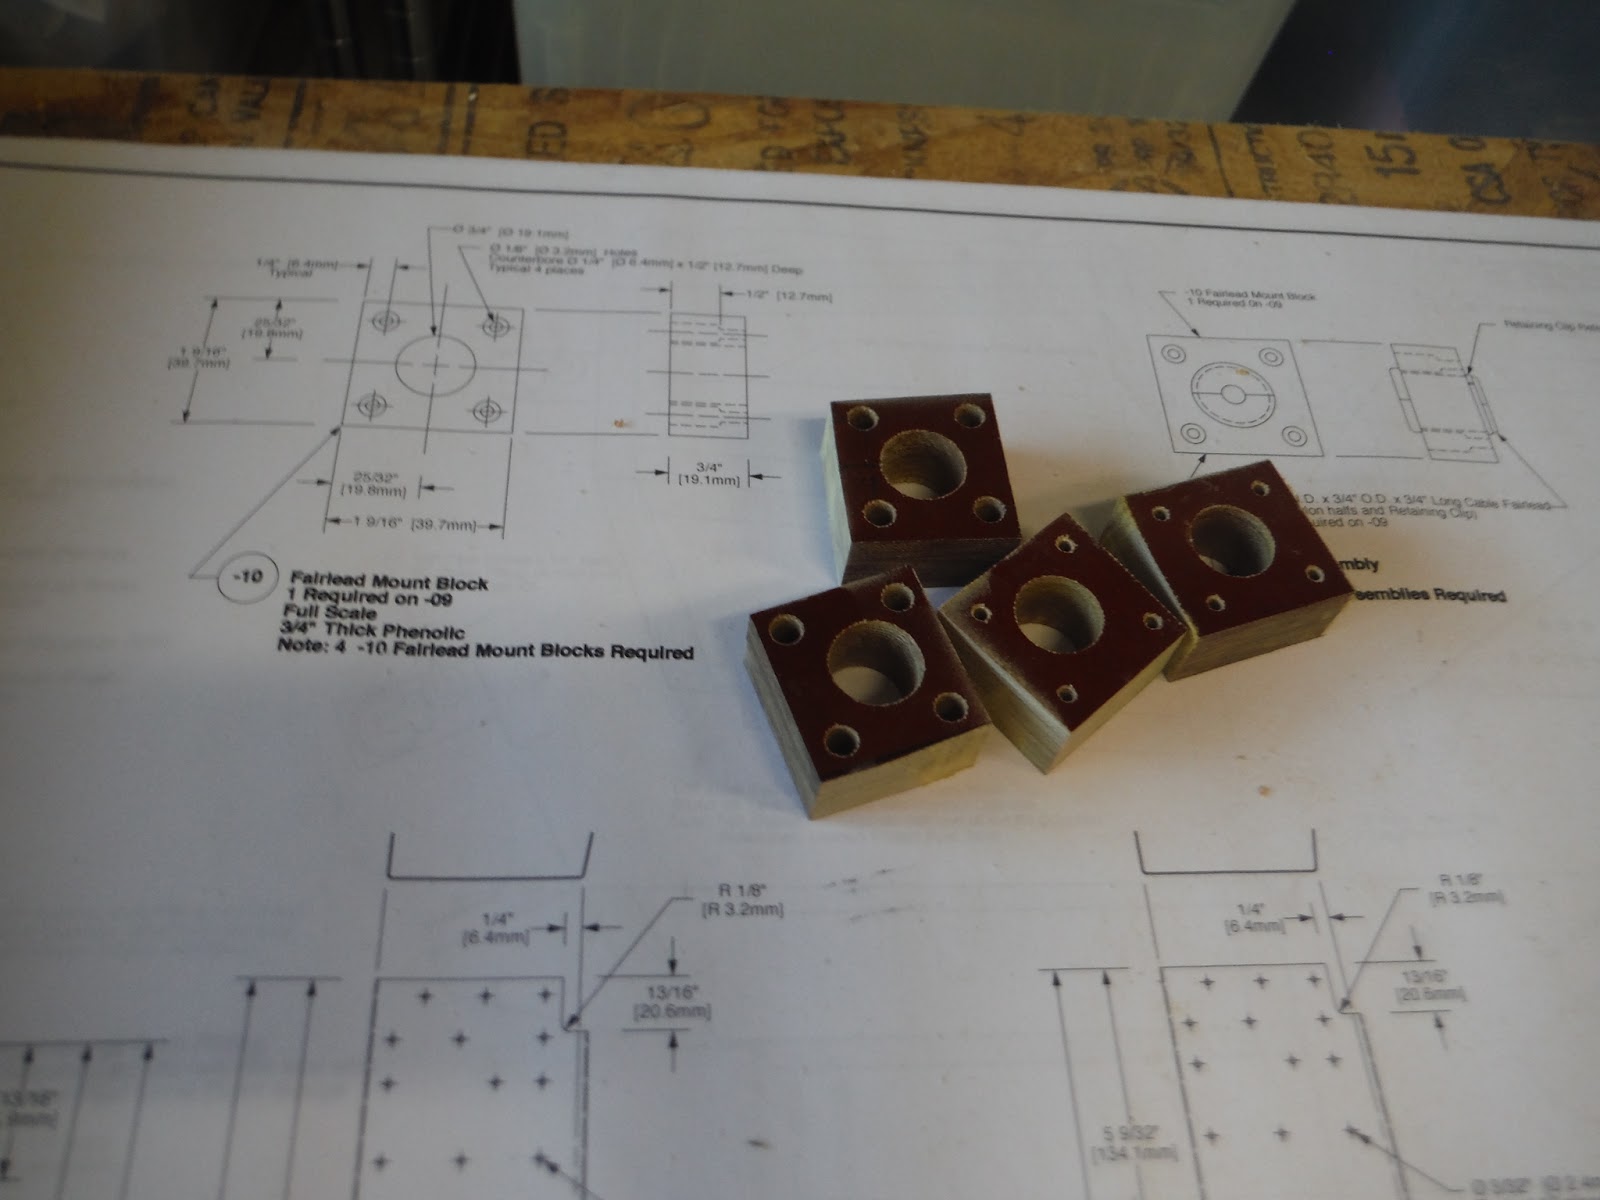
As always the first step was to thoroughly understand the plans. I started at the back of the fuselage plans. The way Sonex makes their plans, the front of the plans are the finished product, and the back contains all the small pieces needed for sub assemblies.