Saturday started early, I woke up brushed my teeth, washed my face, and the like. I looked at my clock 0657. "Perfect timing." At 0700 my dad and I were pulling out of the driveway, off to fly at the airport. When we arrived at the airport the low clouds still had not burned off. They were only at about 700'. A check of the weather revealed that they were supposed to lift to 2,000' soon. We pulled out the Sonex to fly. Even before dad turned crosswind, we both knew that this was not going to work. The clouds, though thin from the surface, made a nearly impenetrable layer sitting right at 500'. Dad quickly flew the rest of the pattern and in no more than 2 minutes, we were on the ground, rolling out from landing. I was faced with a choice, advocate to stay and wait for the clouds to raise, or go home and build. Since this is a build update rather than a flying story, I think you can guess what I chose.

I used a scotch brite pad, contraption chucked into the electric drill driver to rapidly de-burr each hole in seconds. With this technology at my side, the process lasted only 2 podcast episodes! For both skins! Before I was able to de-burr I had to make sure the skin was clear of any metal pieces that could make deep scratches.


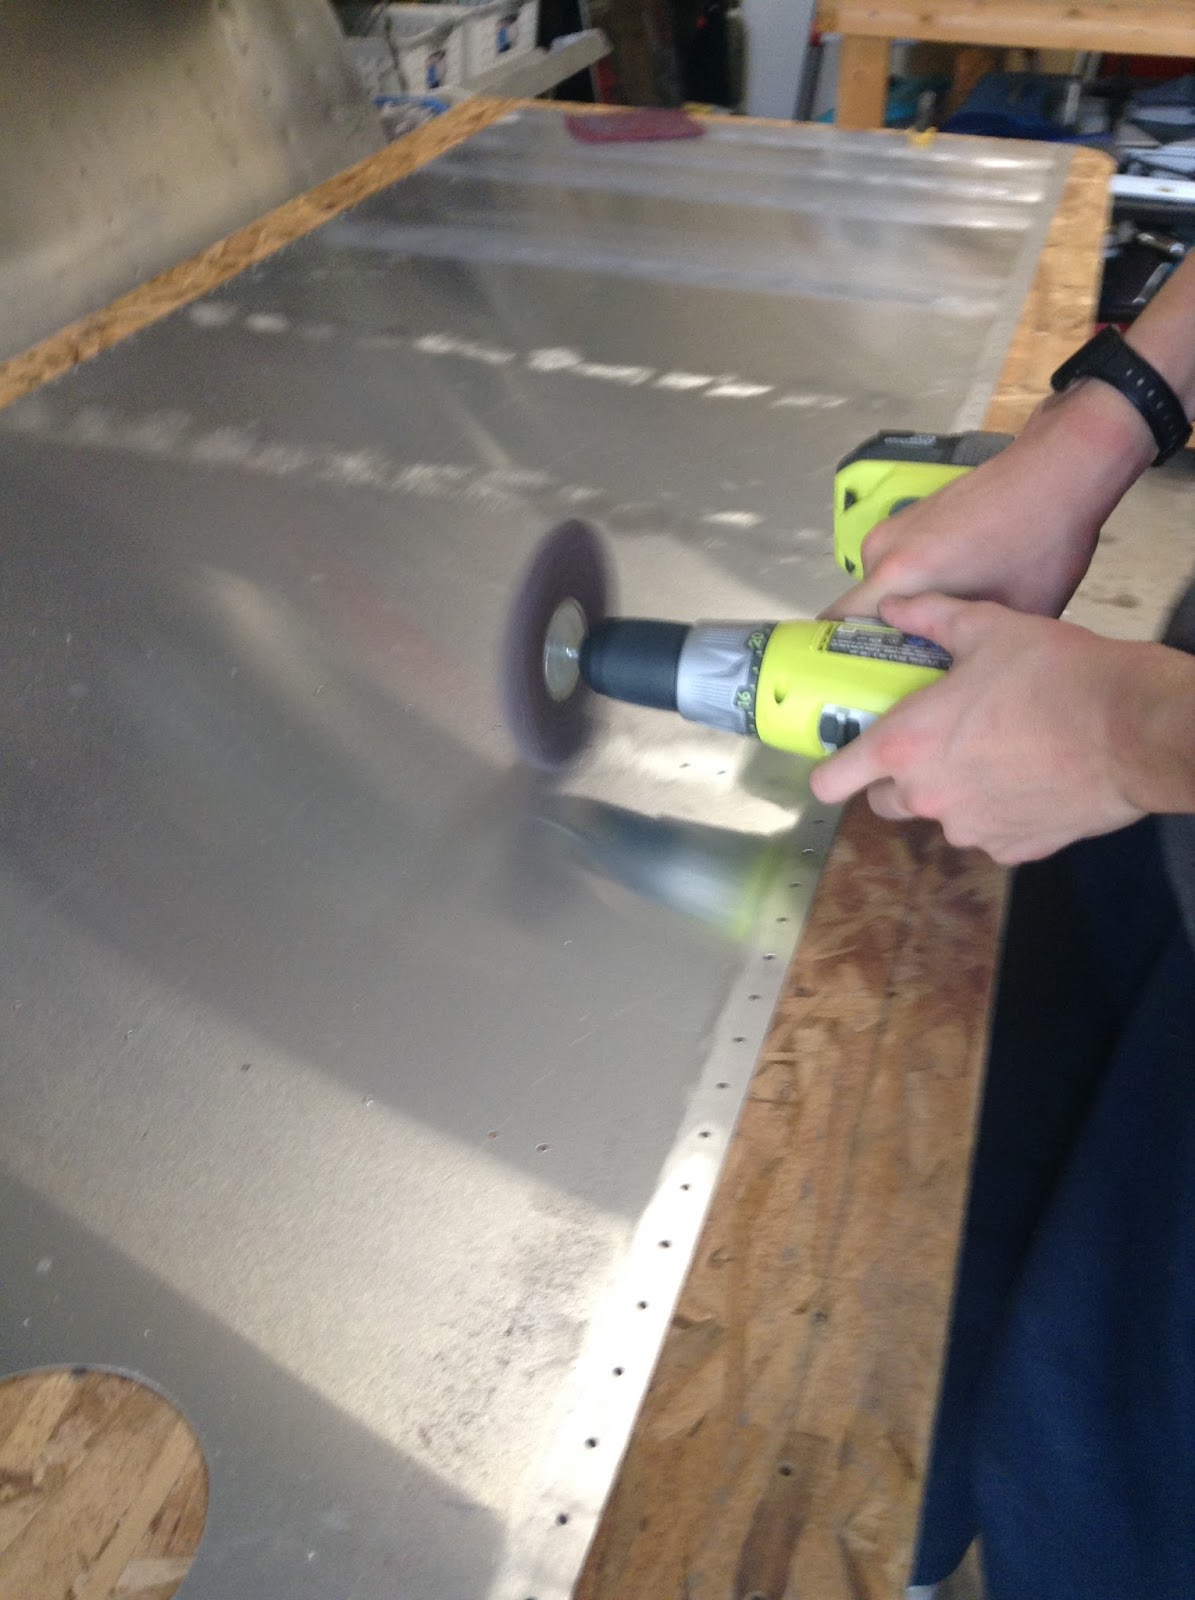


Once the skins were completely deburred (400+ holes!), I cleaned them using Lacquer Thinner on a paper towel. This step is crucial as it removes the corrosive oils from fingerprints and sweat.


The leading edge skin was similar to the aft skins, but with one important difference, It was not flat but bent. Aside from some awkward maneuvering, the process was the same. Clean the surface, de-burr the holes, Clean with lacquer thinner. And before I knew it, my dad and I had blown through all of the skins! I figured, might as well dimple the leading edge skin, the day is still young. My dad and I tag teamed the leading edge skin's dimpling job. He was on one side inserting the nail, which held one side of the dimple die. I was on the other with the hand squeezer and the other side of the dimple die. It was slow going at first, but soon enough there remained only 6 lines of holes, then 5, then 2, then 1, then I was done.


 After a plans review, I concluded that the next step was to square the wings, and cleco the aft skins on. When clecoing on the aft skin I started in the middle, and spread outward in a wave. This assured that the skin was on square.


 |
| Using Magic to bend down the leading edge skin does not work quite as well as the ratchet strap method. |
With all the skins clecoed, and nothing remaining to do inside the wing, I prepared to rivet. The sonex's wing uses 3 types of pulled rivets. Flush rivets for the leading edge skin, normal dome head rivets for the aft skins, and extra long domed head rivets on the spar cap. I double checked what goes where and my dad placed rivets in the holes, while I pulled them with my brand new rivet gun.


One of these rivets does not match.
Luckily it's on the underside of the wing, so it is hardly noticeable.
Luckily it's on the underside of the wing, so it is hardly noticeable.


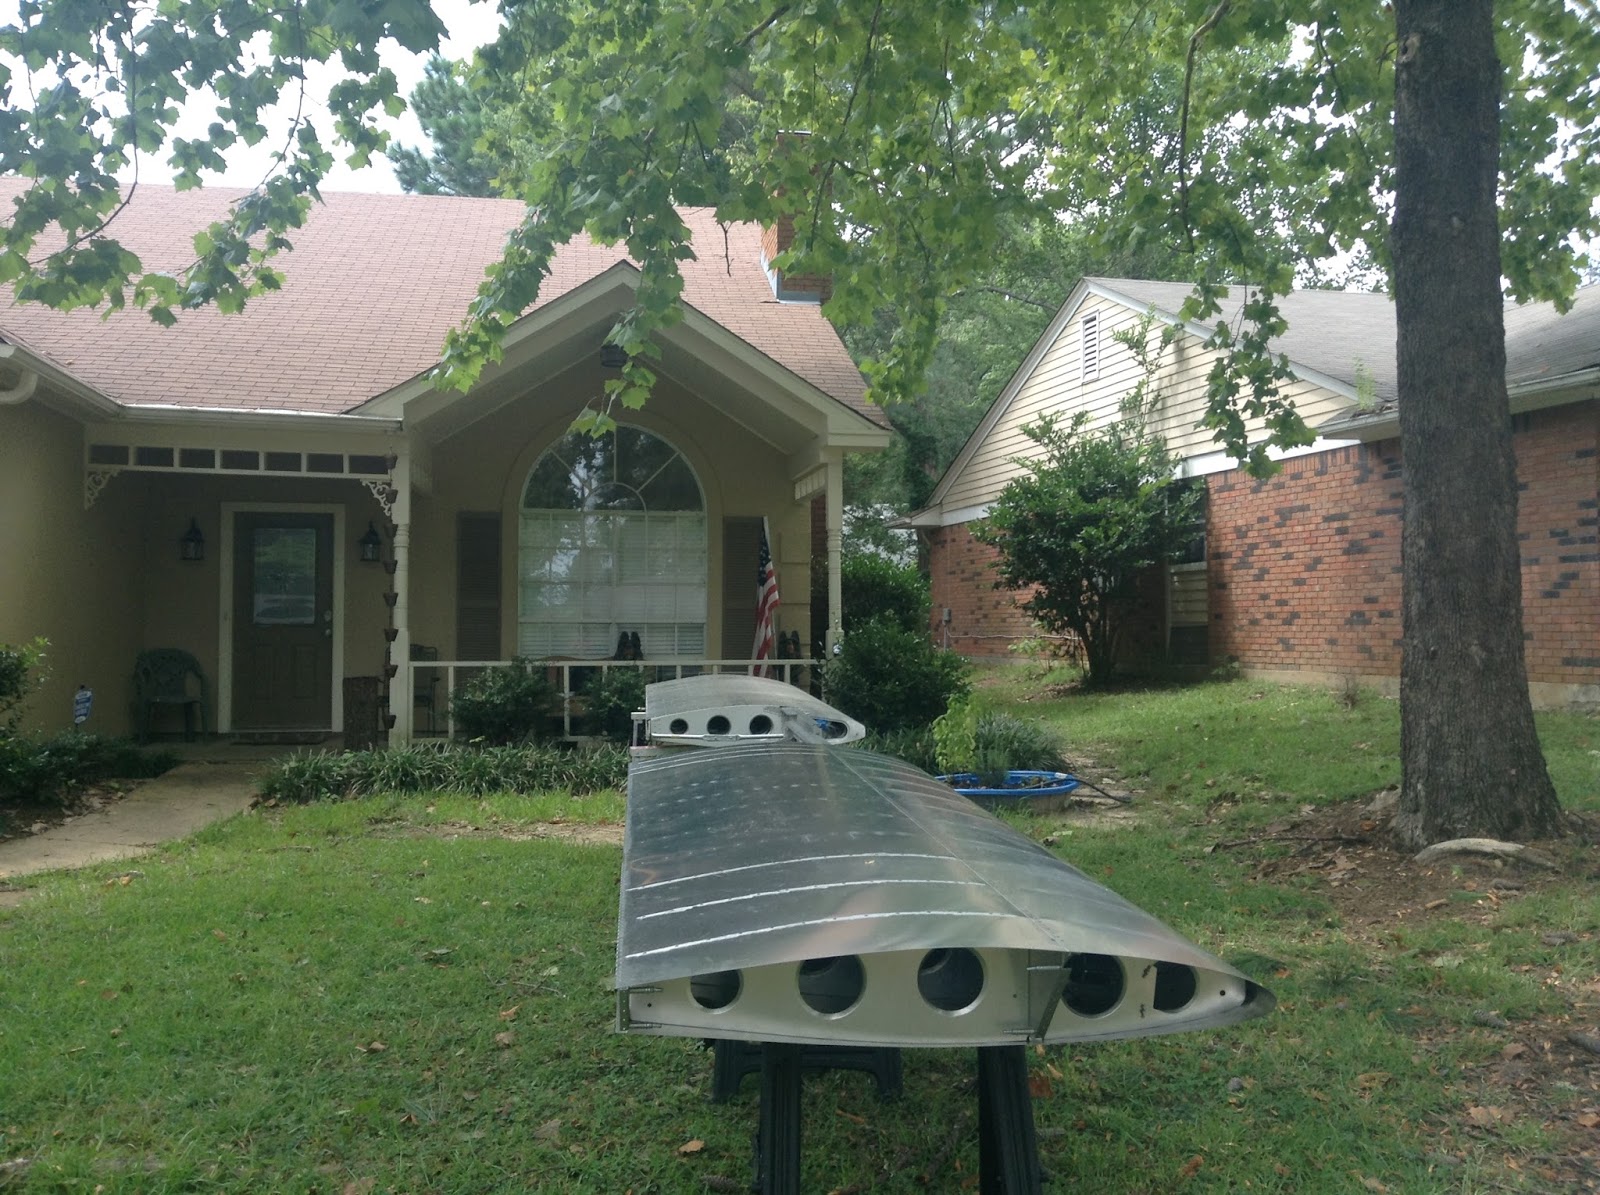

With the wings riveted, I'm ready to fly! On the The fuselage!
Thank you so much to everyone who allowed me to childishly pretend to fly while standing between my wings! Sooner than I know it I will be sitting between these same wings.
Mr John
Paul Shadwick
Stan Whitfield
Ron Sipple
Ralph and Joyce Shultz
Paul and Beth Duff
Paul Hockin
Nicholette Shultz
Gordon Fern
Anon Anon
Jeannette Shultz
Mike David
Jonathan and Julia Wolfe
Jon Palmstrom
Laurie Burns
Donna Mickel
Dana Baker
Mrs Nadine
Eric Johnson
Tammy Reap Hayes
Jeff Shultz
Brandon Lenart
WP Marsh
Michael Couillard
Mr Anonymous
Joe And Judy Green
Mrs Brenda
Mrs Cathy
Paul and Vickie Laberge
Judy and Roger Kemmerle
The purpose of this blog is to document and share my experience of building and later flying an airplane. In the first portion, I will thank all the wonderful people who donated to me. Then in the second section I will post a building update, hopefully every 3-4 days ,explaining what I have done in detail and with pictures. Finally in the third and last section, I will post my flying adventures, and any maintenance I do. Thank you or your support and interest, I am pumped to be executing this project.