First off, what is a turtledeck? The answer is obvious at first, it is a wood platform on the back of the house, with a bunch of turtles sitting on it, right?

Or maybe it is what you call the deck of a cruise ship that is for turtle pleasure?

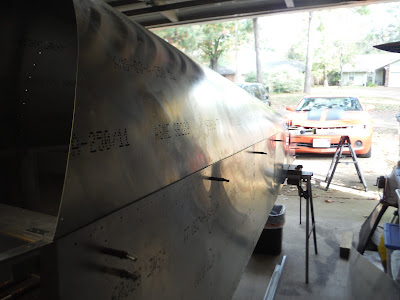
Well actually it is the round part of the plane behind the cockpit, that leads into the tail, as seen in this beautiful Sonex.

So, now that we know what a turtledeck is, I can get into how I built one!. Like everything, It started with a plans review. The turtledeck skin was made of 2 smaller skins (a left and right) and a central spine of a stiffening C-Channel. The skin then is curved to make it rounded, pretty, and aerodynamic.
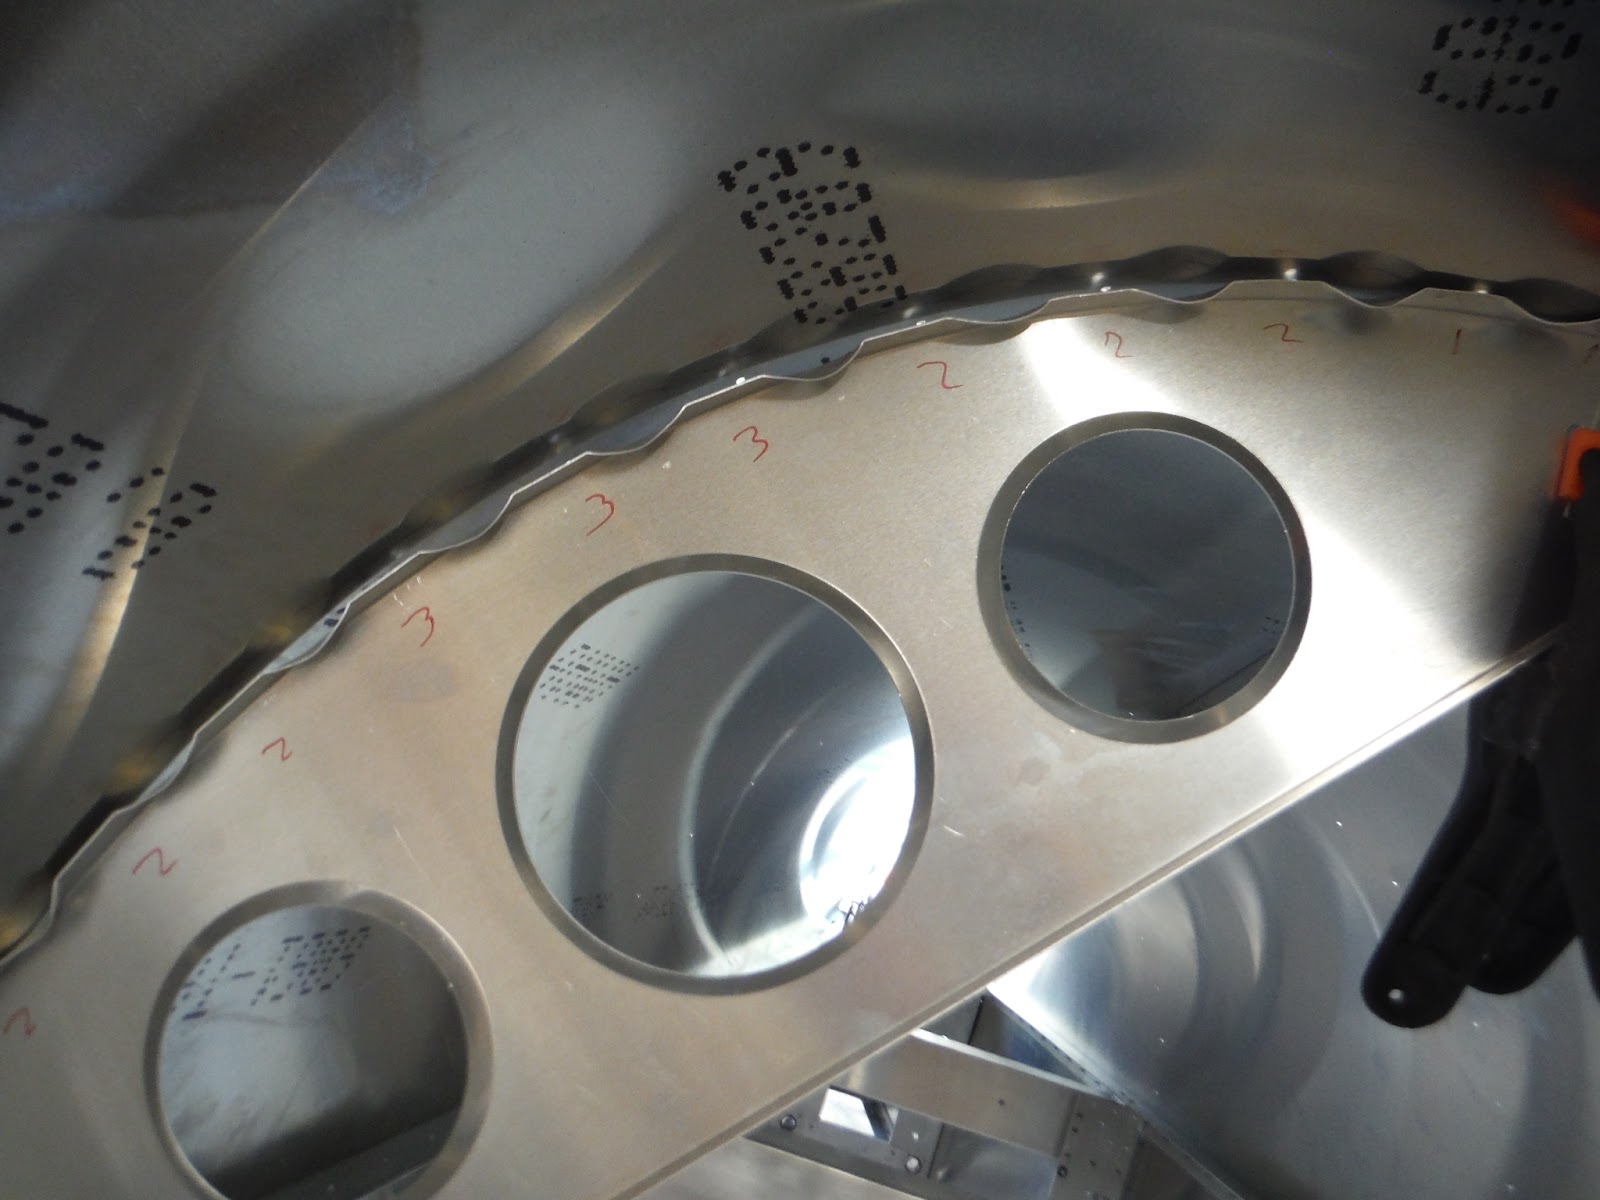
I then prepared all the parts. The turtledeck formers were up to the plate first, they look like this:

I made sure that they had no stress rising scratches. (rule of thumb is that if you can catch a fingernail in the scratch, then it is too deep and must be buffed out.) Aside from that I checked them against the plans to ensure that they were built correctly. Then I did the same for the large C-channel. The skins were a little different. I needed to make a slight notch in the back of them. I laid out the cuts I would need to make using a sharpie and ruler (In millimeters! It is so much easier!) then used the snips to shear it away. I dressed the edges with a file, and then finished it with scotch brite pad. The last parts to check were the small angles that get riveted to the spine (these are what the turtledeck formers will attach to.
Once all the parts were prepared, I set to work building the sub assemblies. I match drilled the small angle clips to the large C channel. I clecoed the two turtledeck skins to the C channel according to the plans.


My compressed air powered rivet gun made short work of that line of rivets.


The way the formers come from the factory, they don't fit perfectly to your turtledeck. it is a fairly complex shape, so what you do is you bend the formers such that they fit perfectly flat against the skin.
I meticulously bent each former, making sure that they fit perfect. When I was done I drilled carefully from the outside in, once everything was updrilled, I disassembled and de burred.

Apologies for the lower detail of this post. I have been SUPER busy, so the specifics have faded.
Thanks to everyone who has helped out with the project!

Or maybe it is what you call the deck of a cruise ship that is for turtle pleasure?

Well actually it is the round part of the plane behind the cockpit, that leads into the tail, as seen in this beautiful Sonex.

So, now that we know what a turtledeck is, I can get into how I built one!. Like everything, It started with a plans review. The turtledeck skin was made of 2 smaller skins (a left and right) and a central spine of a stiffening C-Channel. The skin then is curved to make it rounded, pretty, and aerodynamic.
I then prepared all the parts. The turtledeck formers were up to the plate first, they look like this:
I made sure that they had no stress rising scratches. (rule of thumb is that if you can catch a fingernail in the scratch, then it is too deep and must be buffed out.) Aside from that I checked them against the plans to ensure that they were built correctly. Then I did the same for the large C-channel. The skins were a little different. I needed to make a slight notch in the back of them. I laid out the cuts I would need to make using a sharpie and ruler (In millimeters! It is so much easier!) then used the snips to shear it away. I dressed the edges with a file, and then finished it with scotch brite pad. The last parts to check were the small angles that get riveted to the spine (these are what the turtledeck formers will attach to.
Once all the parts were prepared, I set to work building the sub assemblies. I match drilled the small angle clips to the large C channel. I clecoed the two turtledeck skins to the C channel according to the plans.


Then I fit it in place, the turtledeck skins set between the upper longerons, and the side skins. I carefully positioned the turtledeck assembly. When I was satisfied of it's position, I drilled through the sideskin holes

Once everything was drilled, I removed the turtledeck, and de burred all the holes.


I put the turtledeck back on, and started to cleco it in place. but the joint (where the 2 skins overlap)was in a lot of tension being held by just clecos. so I removed it again, and decided to rivet.


Hangin' out in the baggage compartment!


So now that the Turtledeck was attached (via clecos) to the aft fuselage, I needed to start putting in turtledeck formers.
I meticulously bent each former, making sure that they fit perfect. When I was done I drilled carefully from the outside in, once everything was updrilled, I disassembled and de burred.

With everything de burred and at final size, it was time to rivet. Riveting went by in a puff of air, and a clatter of rivet stems.
I was left with a beautiful smooth metal aft fuselage.
Next up is the forward fuselage, where I will someday soon sit!
Happy new year to all you guys out there, and 2018 will be great year for building.
Hopefully a good year to fly too, 2017 had pretty awful weather!
Thanks to everyone who has helped out with the project!
Mr John
Paul Shadwick
Stan Whitfield
Ron Sipple
Ralph and Joyce Shultz
Paul and Beth Duff
Mario Gonzalez
Paul Hockin
Kevin White
Nicholette Shultz
Gordon Fern
Anon Anon
Jeannette Shultz
Mike David
Jonathan and Julia Wolfe
Jon Palmstrom
Laurie Burns
Donna Mickel
Dana Baker
Mrs Nadine
Eric Johnson
Tammy Reap Hayes
Jeff Shultz
Brandon Lenart
WP Marsh
Michael Couillard
Mr Anonymous
Joe And Judy Green
Mrs Brenda
Mickey Gonzalez
Mrs Cathy
Paul and Vickie Laberge
Judy and Roger Kemmerle
Fico Gonzelaz
The purpose of this blog is to document and share my experience of building and later flying an airplane. In the first portion, I will thank all the wonderful people who donated to me. Then in the second section I will post a building update, hopefully every 3-4 days ,explaining what I have done in detail and with pictures. Finally in the third and last section, I will post my flying adventures, and any maintenance I do. Thank you or your support and interest, I am pumped to be executing this project